Lisa, cooking cassoulet. Photo by Karla Thomas.
A few years ago we did a major remodel to our 1904 Dutch colonial house, including a bump-out for a new kitchen. Given that the old kitchen had — I kid you not — only 1.5 drawers, turquoise formica countertops, and a gas range that greeted every cooking attempt with a fireball, it was more than needed. I obsessively researched kitchens beforehand, and here are the top tips I learned:
1. Plan your kitchen for how YOU cook, live, and entertain.
This sounds like a “duh,” but it’s not. The first instinct of most people is to listen to the old, “Plan your kitchen as a triangle between sink, stove, fridge” advice, believing it to be the most efficient. Or they listen to their kitchen designer (or architect) about what would look good, even though the architect never cooks and has no idea of the flow of a working kitchen.
Where do your groceries enter the house, and how far will you have to carry them before putting them away? How far will cooked food have to travel, to get to the main table or counter for eating? How far do dirty dishes have to go to get cleaned, and once cleaned, how far must they travel to be put away?
My kitchen ended up a “modified galley” — pretty much a long thin U, with food stored at the bottom of the U. From storage it moves up one leg of the U: to a prep sink for washing/thawing; onto the butcher block counter for chopping, mixing; onto the stove; then out the top of the U for eating. Dishes go into the top of the U and travel down the other leg (opposite the prep leg) from sink to dishwasher to storage.
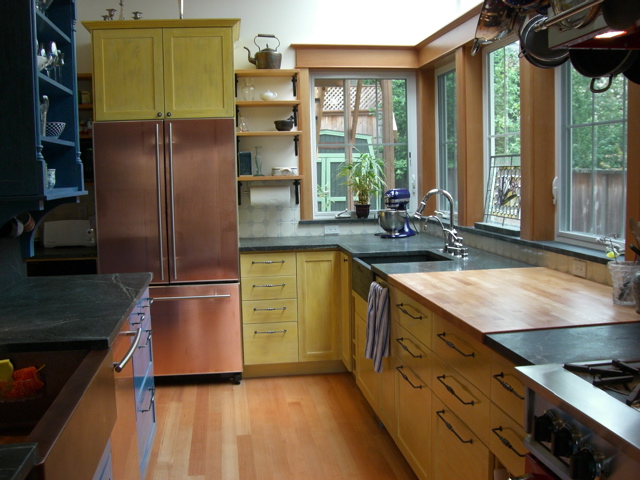
You can see how food flows from the fridge to the prep sink to the cutting board to the range. The countertop is 30″ deep, the aisle is 4′ wide. The butcher block top is from Ikea.
My range and refrigerator have about twelve feet between them, because I use that space to prepare the food for cooking.
Don’t listen to a kitchen designer who’s there to sell you cabinets, or to an architect who doesn’t cook. They do not know better than you how you will use your kitchen. Gird your loins to push back against the “professional.”
2. If you have an aisle of any sort between countertops (like in a galley kitchen, or between an island and a bank of cabinets), make it 4′ wide. This allows space to get by open drawers, dishwasher, or a second cook. I had to push our architect on this one, but we’re so glad we did it.
3. Where possible, make your countertops 30″ deep instead of the standard 24″. This means there will be 6″ of wasted space behind your lower cabinets, between them and the wall, but so what. The extra 6″ in countertop space is vital. It allows you room to have stuff on your counter (knife block; canisters holding spoons, spatulas; coffee maker) while also having plenty of space to work.
The most important element of a kitchen for someone who cooks is counter space. Counter space. Counter space and a good, sharp knife will get you most of what you need.
Make sure you have at least 1.5′ of countertop to either side of your range. You need that space for setting things down as you cook.
4. Sinks and faucets: If possible, have a prep sink of a decent size (big enough for a colander) and a main sink that is as big as you can fit in your kitchen. This allows clean food to be kept separate from a sink filling up with dirty utensils, pots, and bowls. We chose our big sink based on the size of our largest pans and carving board.
Make your faucets tall, with pull down spray handles, not pull out. With a pull down spray, you don’t need to twist your hand to use the spray. It’s a small difference in efficiency, but important.
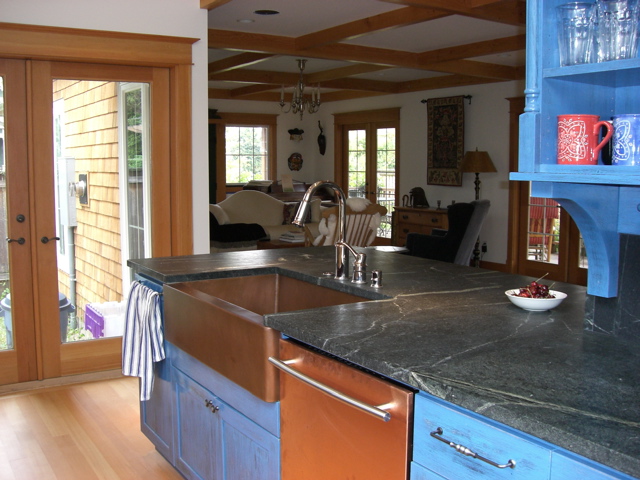
Simple pull-down spray faucet, above a sink big enough for any pot or cutting board… or dog or child, for that matter.
If you have the extra money in your budget, a TapMaster is great fun. It’s a foot pedal attached to the baseboard of the cabinet beneath the sink, that controls the on/off of the faucet. Like a doctor scrubbing up for surgery, you never have to touch the faucet with your dirty hands. It’s great for when your hands are covered in, say, raw chicken.
The Never M-T is the best $12 you’ll spend (for 4! Give the extras to friends) if you have a dish soap dispenser built into your counter /sink (and why wouldn’t you?). It’s a plastic hose that attaches to the bottom of the soap dispenser, then snakes down into whatever economy-sized jug of dish soap you buy. It means you can go several months without having to refill your dish soap; and refilling just means switching out the jug.
Do you know what an “air switch” is? It’s a button on your countertop that will run the garbage disposal. No, you don’t need to have a light switch on the wall to run it.
5. Non-traditional storage may work much better for you than the traditional “lower cabinets plus upper cabinets, as many as can fit.”
While designing our kitchen, I kept in mind both that I’m short and so can’t reach most anything beyond the bottom shelf of an upper cabinet, and also that we wanted lots of natural light. The kitchen is on the north side of the house and we’re in the Pacific Northwest, so light is an issue. My solution was to have no upper cabinets, and instead putting a bank of windows where they would be, plus skylights overhead. (Side note: skylights on the north side of a house are fantastic, because they never get direct sunlight. I want light, not heat.)
No upper cabinets along that back wall, but plenty of light.
So where do I store everything?
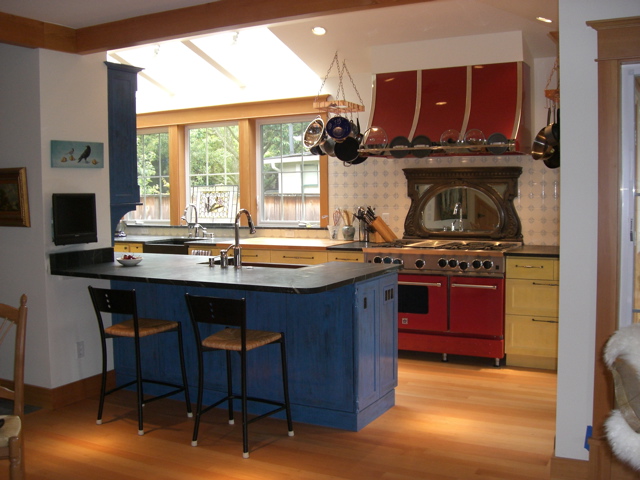
I put hanging pot racks to either side of the range. All I need to reach is the bottom of a hanging pot, and they’re all accessible without having to unpile them from each other. Most pot lids are in a rack on the front of the range hood.
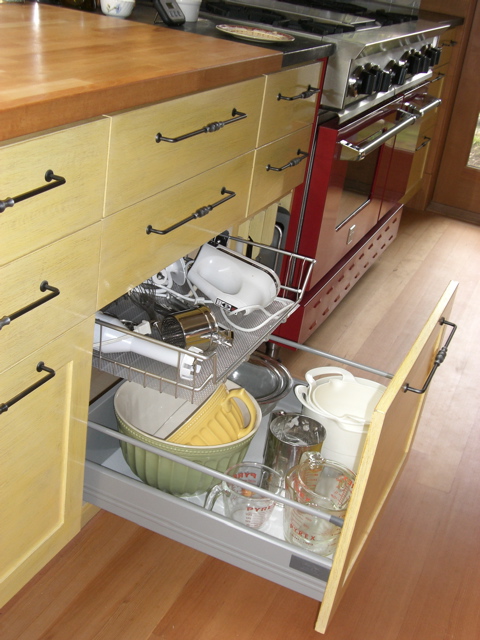
My lower cabinets are almost all drawers. I store dishes, pots, spices, and small appliances in them (blender, food processor). All hail the drawer! Drawers are better than cabinets with doors and pull-out shelves in them, because who wants to open a door and then pull out a shelf, when you can do both with one motion?
The cabinets are from Ikea, although the configuration you see here doesn’t exist in their catalog: I found Ikea hack advice online, and used it to construct the storage I wanted. Our housepainter painted the cabinets blue and yellow for us.
I have open shelves for glassware. Yes, the glassware can get dusty if not used. So what. If I’m not using something regularly, why do I have it? Off to Goodwill it goes.
One of the best solutions to *apparently* inadequate storage is to get rid of stuff.
Above the fridge I have a cabinet with vertical slats, for storing platters and trays. Again, this works for a short person because I only need to reach the very bottom of the item to pull it out or put it away.
Non-perishable food supplies — canned goods, rice, unopened bottles — are in a pantry cupboard in the garage. This is stuff I only go to a couple times a week; there’s no reason to have it taking up valuable space in the kitchen. Look in people’s kitchen cabinets, and you often see them crammed full of stuff they rarely use, that’s only there because they didn’t know what else to do with it. You can always find somewhere else in the house to put those things (linen cupboard, bathroom cabinet, piece of antique furniture in the living room). Or, get rid of them.
The rest of the food is in the fridge. Spices and things like flour, sugar, and vinegars are either in a drawer or a pull-out pantry cupboard near the fridge.
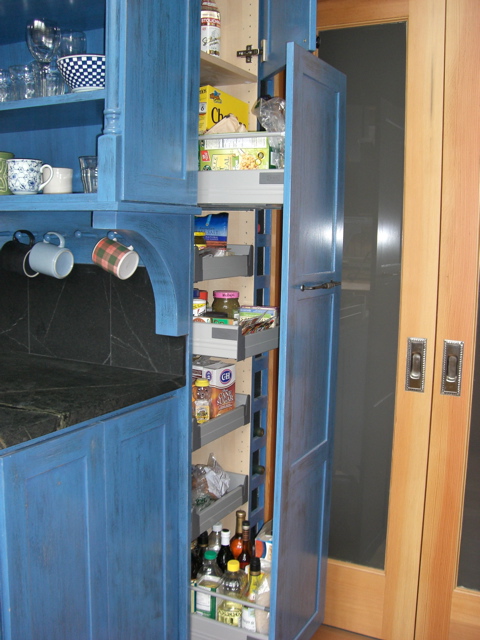
Pull-out pantry. Stores heaps of stuff. Ikea, of course… as is the open cabinet you see to the left. I had our builder add the corbels, mug rack, and trim to gussy it up.
Side note: if storing spices in a drawer, you must have space (like another cabinet) between that drawer and the range. You don’t want the heat from the range aging your spices prematurely.
Bonus Extra Tips:
Don’t want to face a wall while you cook at the range or wash up at the sink? Put a mirror behind it. Makes a world of difference.
If you’re doing your countertops in stone, see if your stone cutter will have enough scraps to do your windowsills as well. Also ask your cutter if he has scraps from other jobs; ours had lots of scrap soapstone, so half the countertops were free. They’re three different types of soapstone, but no one would ever notice.
An InstaHot tap is a lovely thing. We use it for heating up coffee cups, making tea, washing fats and gunk off of knives, and speed-thawing things.
Do your research about how range hoods work. What few salesmen know is that it should be 6″ wider than your cooktop. Also, if you’re going with a high-powered one and your house is very tightly constructed — no drafts, no gaps around doors and windows — you should install some air intake openings. I have one in the kitchen wall, and one upstairs, to help with air flow. We tested it, and when the vent fan in the kitchen is going, the upstairs air intake flaps open up.
If there will be eating at a kitchen island, make the island all counter-height. Don’t make part of it bar height. Having all one height means that you have more continuous work space, more eating space, more everything space.
If you have space, consider a beverage fridge. I was always driven half-mad by bottles of pop, beer, and wine in our refrigerator, and it’s made life much easier to have all that shunted off to the side, to the beverage fridge. The beverage fridge also doubles as extra storage for fruit and vegetables.
A microwave doesn’t need to be built in. It can sit on a shelf.
No one looks at pendant lights. No one looks at any lights. It’s our instinct, I think, not to look directly at a source of light. So. Don’t fuss too much about what they look like, and spend your big money elsewhere. That said, you do need to think carefully about light placement and control so that you’re never working in shadow. Lighting matters, but only in its function, not so much in how the fixtures look.
Having trouble settling on a style? Find one object, one thing, that you love and must have in your kitchen, then use that as your starting point. I wanted a red range and range hood, and that set the tone for my kitchen design. All decisions spread from there. I also found it helpful to find a historical style that I could use as inspiration… not to follow, but rather to keep me on track. I liked Scandinavian Arts & Crafts — bright colors and a homey, hand-made feel, like in the art of Carl Larsson.
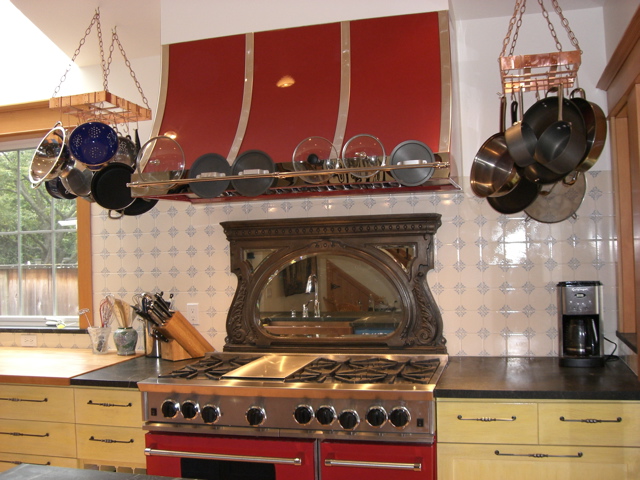
The red range from which I took my design direction. By the way, all those tiles on the wall? I glazed them myself, as I wanted Dutch-style tiles but couldn’t afford the real thing. The mirror is an antique iron over-mantel from a fireplace.
For ideas and advice, haunt the kitchen forum at GardenWeb. Seriously knowledgeable people there.
*
Did you find this advice helpful? If so, show the love and check out some of my romance novels. After all, you’ll need something light-hearted to read while you’re suffering through your kitchen remodel. 🙂
Available now for pre-sale at all e-book retailers.
-

- July 28, 2014
-

- August 25, 2014
-

- September 22, 2014
1,001 Erotic Nights
Part 1: Slave Girl
Slave girl Nimia is in erotic training to become the sex toy of her Roman master, while around them the last vestiges of the Western Roman Empire fall into barbarian hands. It’s a barbarian prince, Clovis — the future King of the Franks and founder of France — who steals her virginity from her jealous Roman ruler.
Part 2: Barbarian’s Concubine
Fleeing her master, Nimia runs into the cold, calculating arms of power-hungry Clovis and learns how barbarian desires make the Romans look refined.
Part 3: Siren of Gaul
Nimia is sent to seduce the Visigoth king Alaric, in order to capture a key Roman general and change the course of history… as she also changes Alaric’s perceptions of morality. A repressed Visigoth is no match for a siren trained by the most depraved of Romans.
Coming Summer 2014, from Simon & Schuster
iTunes Amazon Barnes & Noble Simon & Schuster
Read Chapter One